4.3 | Data model properties
Let's go through some of the data model properties which we can configure.
4.3.1 | Hiding tables and fields
If a table column or even an entire table should not be shown in the report builder (Report view), we can hide it in the Model view.
This can be done directly in the data model illustration or in the table navigation to the right of the window. In both cases, simply click on the eye-symbol while hovering over a table or field.
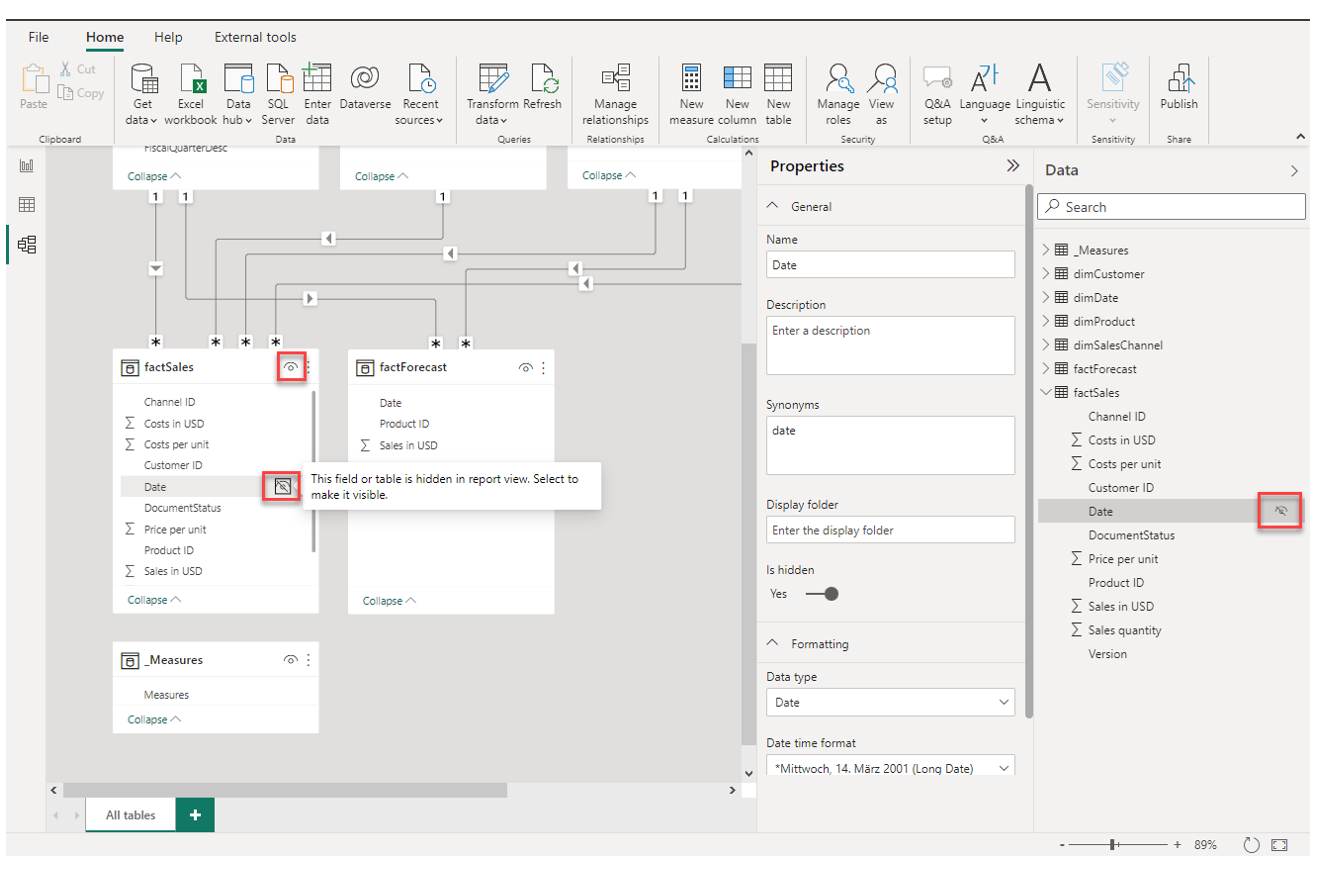
It is considered good practice to hide the foreign key fields in the fact tables so users do not accidently use them when they work with the data model.
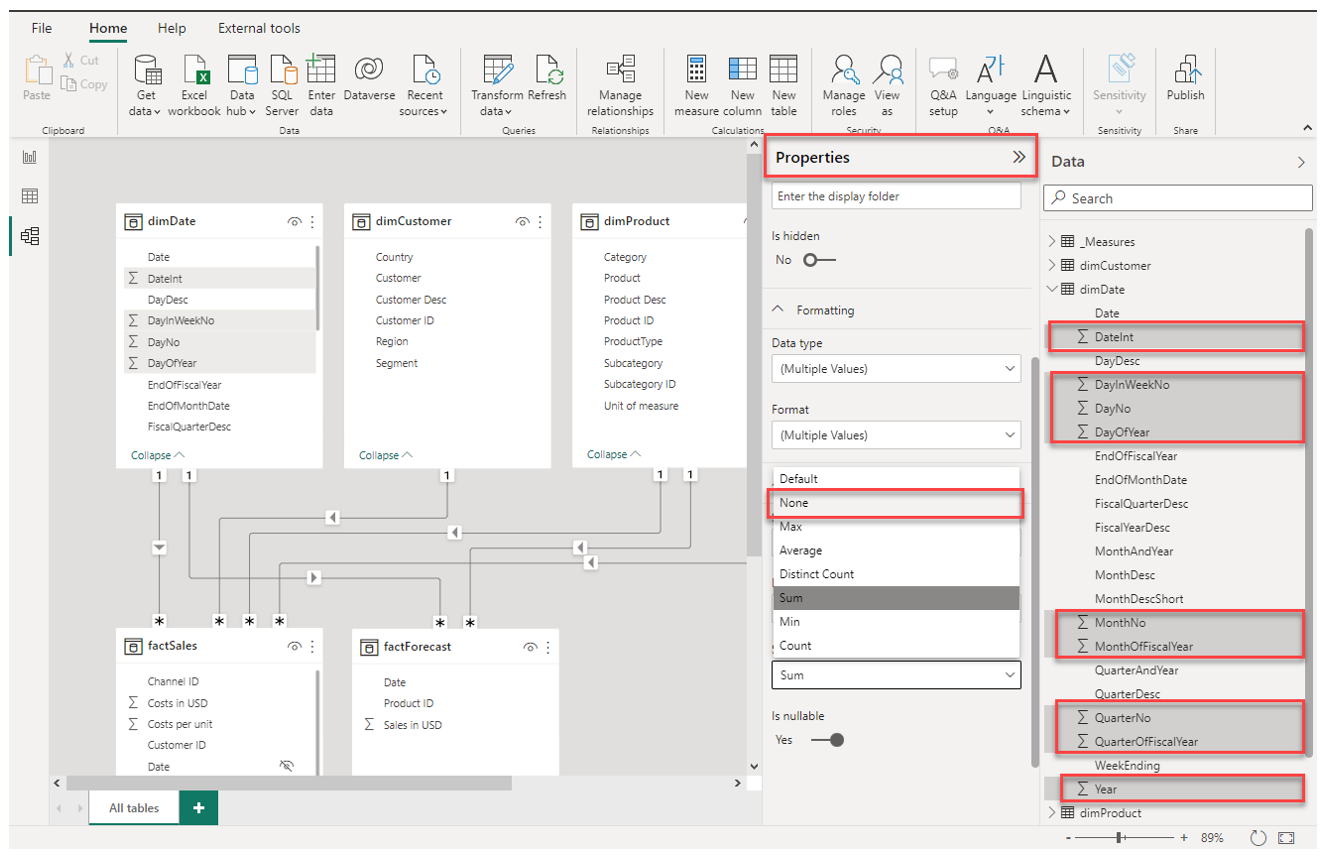
4.3.2 | Default aggregation of fields
Each field has a default aggregation setting which is applied as soon as it is placed in a visual in the report builder. Sometimes however, we want to avoid the automated aggregation for certain fields. A good example in our model are some fields of the date dimension dimDate. As you can see, there is a summation-symbol to the left of some fields. Power BI has automatically set this default aggregation because these columns have a numerical data type.
Select all fields with a summation-symbol in dimDate (you can select multiple fields while holding the CTRL-key) and then in the Properties pane, scroll down until you see the option Summarize by. Select "None" in the dropdown. The summation-symbol should have disappeared for the selected fields.
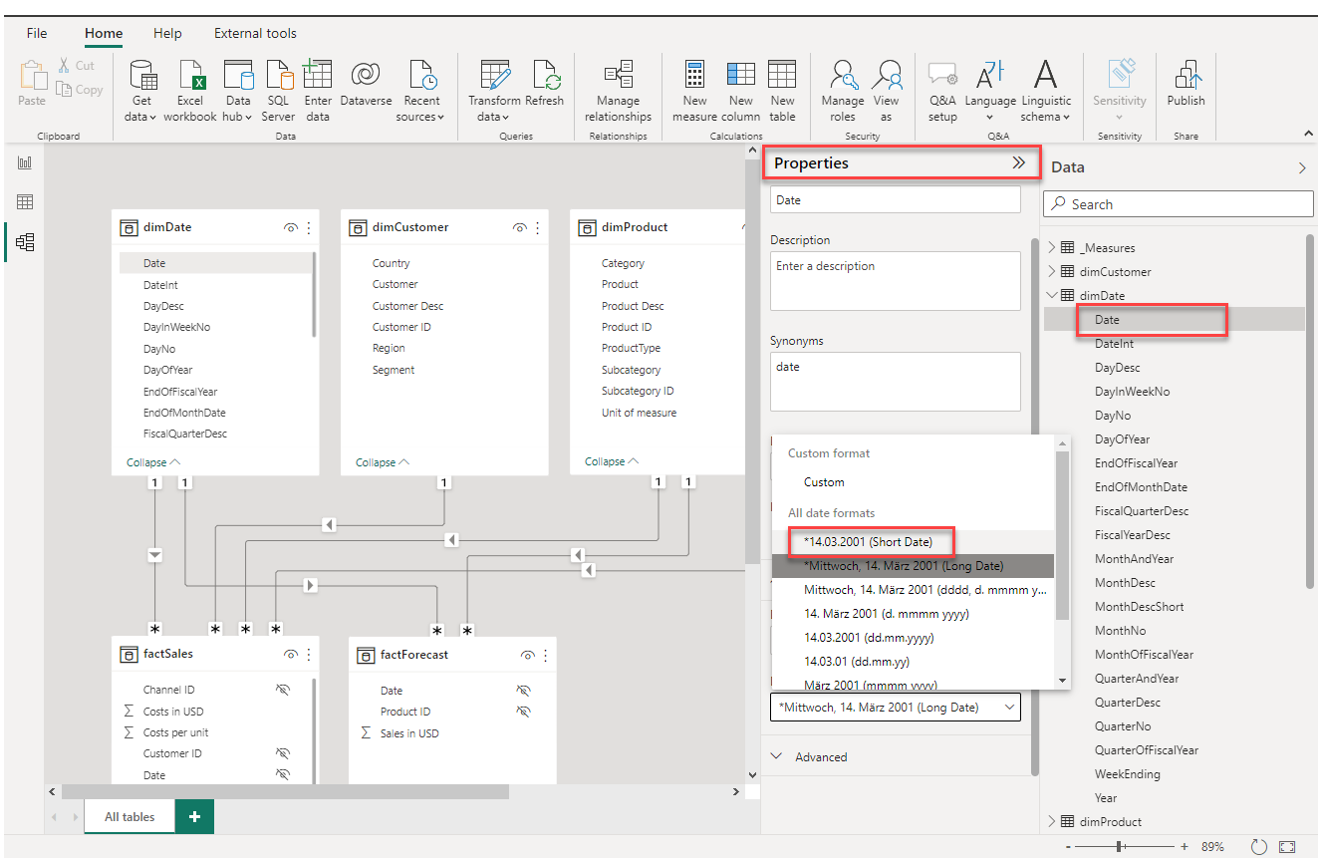
4.3.3 | Formatting options for fields
The same way as changing the default aggregation, we can configure the formatting options for a field. In my practice, I use this often for data formatting. Select the field Date in dimDate and have a look at the Properties pane. There is an option Date time format with a dropdown. Open the dropdown and select the first option ("Short Date").
4.3.4 | Hierarchies
We can create custom hierarchies based on columns in tables. This can be useful if a certain hierarchy is used many times in visualizations and dashboards. Let's create a hierarchy in dimProduct consisting of the product category, subcategory and product itself.
To do that, do a right-click on the field Product in dimProduct and select Create hierarchy. A new element should have been appeared in the navigation pane, likely called "Product Hierarchy". Select this new element and in the Properties pane scroll down to the option Hierarchy. There we can select and add additional fields to the hierarchy via the dropdown. After we have selected all fields and arranged them in the correct order via drag-and-drop, we can apply the changes to the hierarchy via Apply Level Changes.
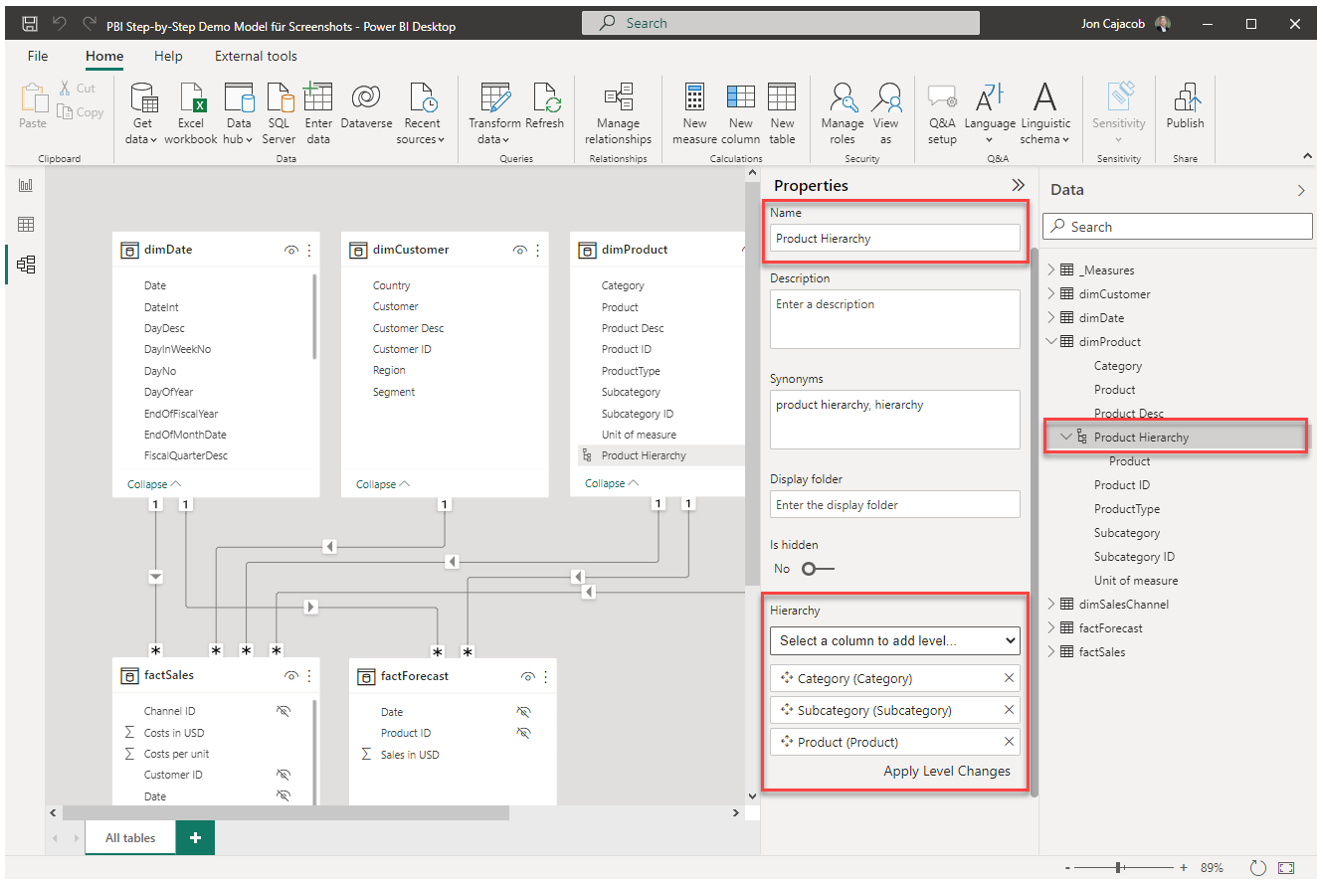
We can also rename the hierarchy if needed under the option Name in the Properties pane.
4.3.5 | Changes to multiple fields at once
As we have seen for the field formatting options, we can select multiple table fields at once while holding the CTRL-key and then apply changes simultaneously to all selected fields. This can be useful to for example hide multiple fields at once faster.