6.3 | Automated data refresh setup
6.3.1 | Overview
The automated data refresh of datasets in the Power BI Service is one of the key features of the platform. When users open a report in the morning of a new day, you want to make sure that they are looking at the most current data.
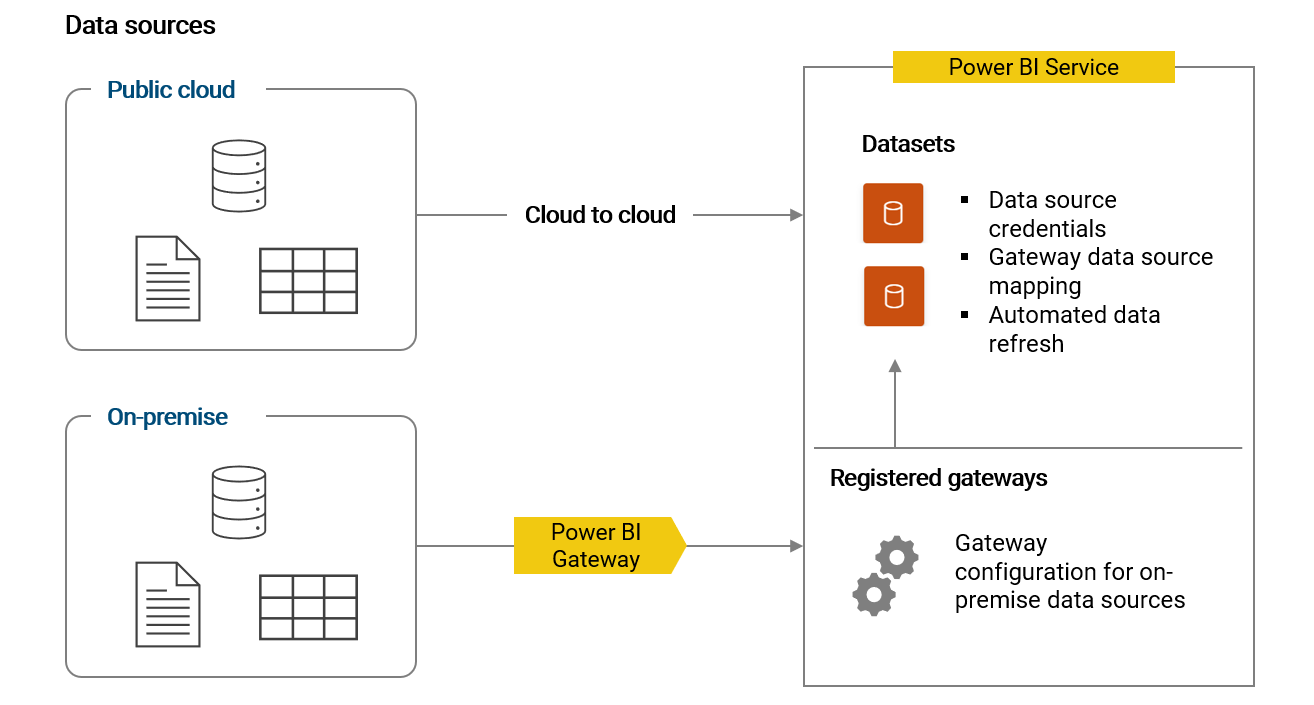
The automated data refresh is configured per individual dataset. For all data sources to which a dataset is connected to, the data source credentials have to be provided in the dataset settings. There is an important distinction between data sources that reside in a public cloud network and those that reside in an on-premise network. For the latter, a Power BI Gateway has to be installed and kept running on a server in the on-premise network.
When installing the Power BI Gateway, it has to be registered with an e-mail address that has access to the Power BI Service. After registering, the gateway becomes visible in the Power BI Service and on-premise data sources can be configured with the respective user credentials.
Then, for each dataset that connects to on-premise data sources, the registered data connections from the gateway can be mapped accordingly in the dataset settings.
The following illustration summarizes how datasets are connected to public cloud and on-premise data sources:
Useful links
- The Power BI Gateway can be downloaded here: https://powerbi.microsoft.com/en-us/gateway/
- The official documentation of the gateway can be found here: https://learn.microsoft.com/en-us/power-bi/connect-data/service-gateway-onprem
6.3.2 | Configuration of the automated data refresh for the demo dataset
The best way to demonstrate how to set up the automated data refresh for a dataset is to do exactly that for our demo data model that we created in the earlier chapters.
For this configuration to be possible for you, the following requirements have to be met:
- You have access to a Power BI Service tenant
- Your user has a Power BI Pro license (alternatively, the 60 day trial is sufficient)
- You have at least the basic version of Microsoft 365 with the Excel app
- You are able to save a file in a Microsoft Sharepoint folder
1. Store the Excel file containing the demo data on your Sharepoint and retrieve the direct URL to the file
Please note, the file can also be stored in a OneDrive synced folder. In the background, the file will still be stored in your Sharepoint tenant.
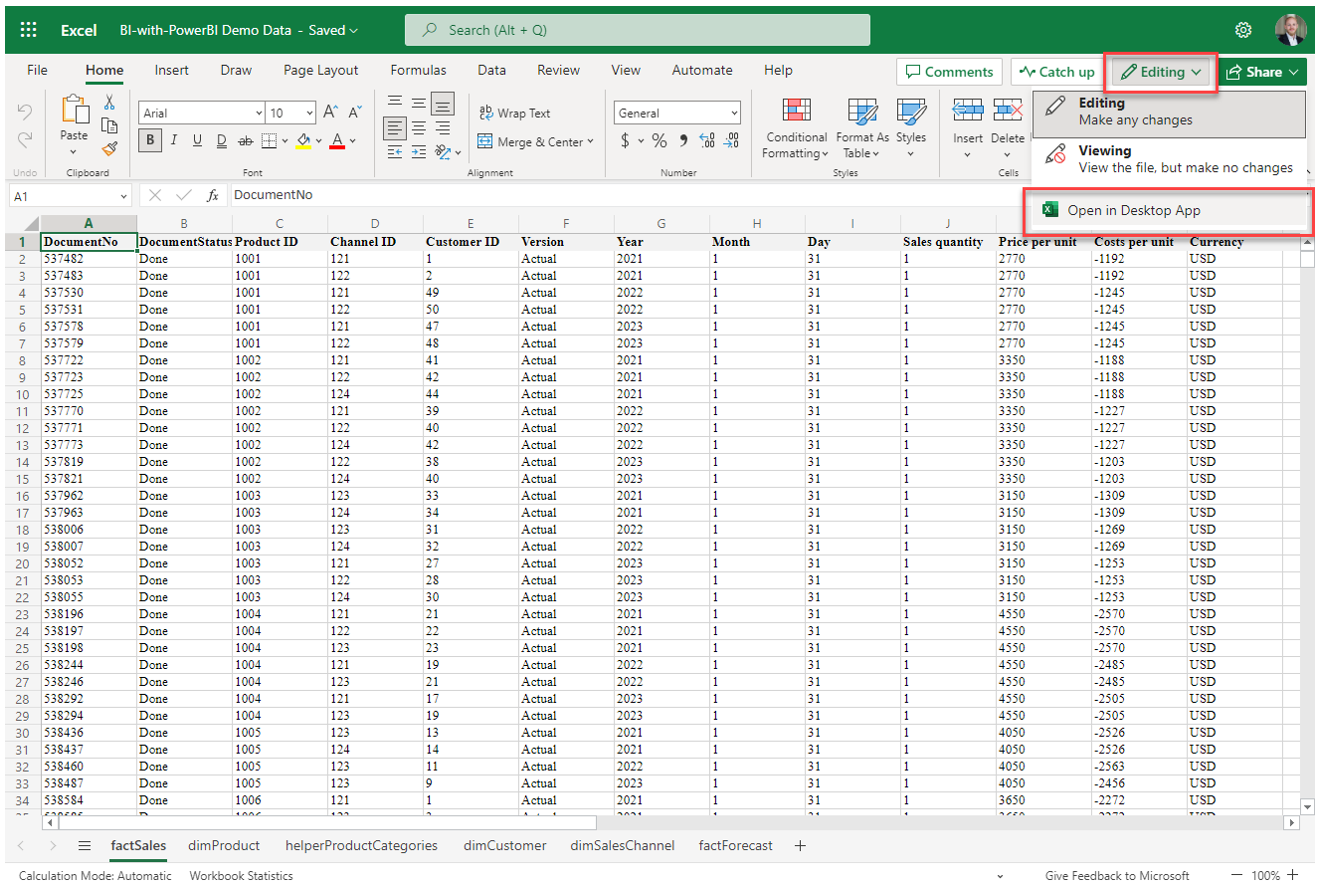
When you have stored the file on your Sharepoint, navigate to it and open it inside your browser. Then, from there, open the file on the Desktop as following:
Continuing in the desktop version of Excel, navigate via File to Info and click on Copy path:
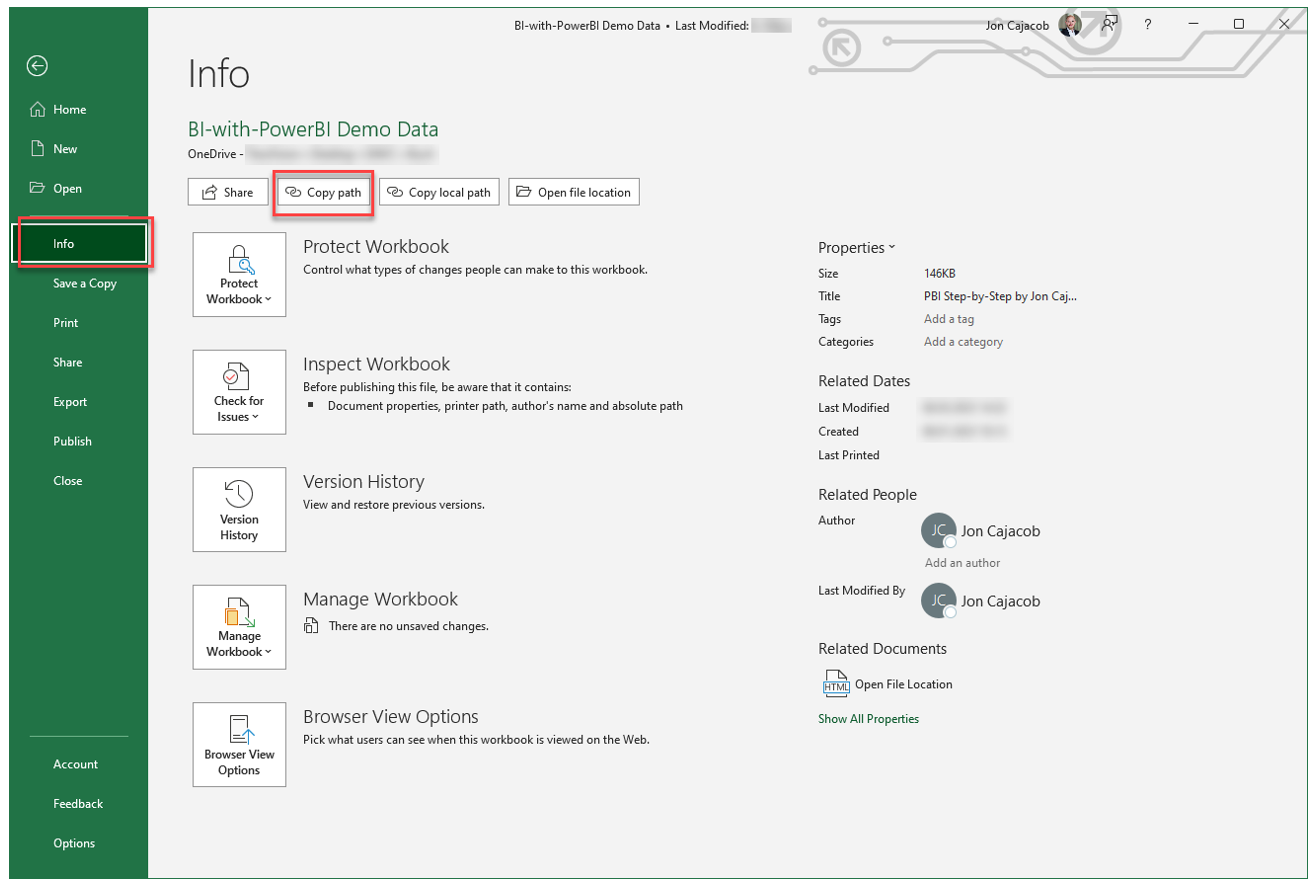
The copied URL should look like the following:
https://yourcompany.sharepoint.com/path.../File.xlsx?web=1
To test the URL, simply paste it into your browser and it should directly lead to the opened File via the Excel app.
2. Adjust the URL
For the URL to work in Power BI, we need to trim the end of it a bit. Please remove the part after the question mark and your link should then look like the following:
https://yourcompany.sharepoint.com/path.../File.xlsx
3. Open the Power Query editor and replace the data source connector in all queries connecting to the demo data file
Remember, currently our Power BI file connects to the demo data via the standard Excel connector whereby the source file was stored somewhere on the local computer. Now we will replace this connector with one that points to the direct URL of the file saved on Sharepoint in the Microsoft 365 cloud.
First, let's prepare the M-code we need for the new data connection:
= Excel.Workbook(
    Web.Contents(
        "https://yourcompany.sharepoint.com/path.../File.xlsx")
    , null, true)
Make sure you use the URL prepared in the previous step between the quotation marks in the code snippet.
In Power Query, navigate to factSales and the step Source. Replace the code with the new code-snippet:

When you do this for the first time, Power Query will ask you for the credentials to connect with the respective Sharepoint. Click on Edit Credentials in the yellow bar and the following small window opens:
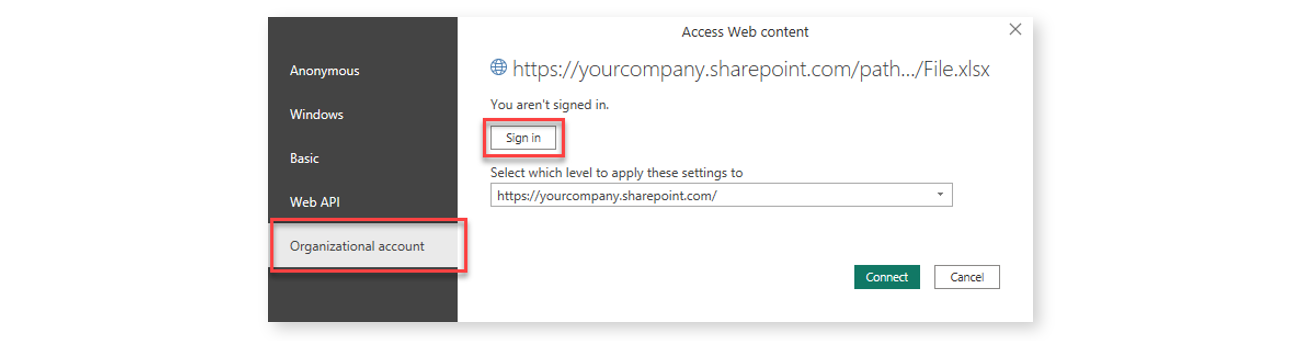
Because the data source is on a Sharepoint we can select Organizational account as the authentication method. Then, click on Sign in and you will be asked your MS365 account credentials. Confirm with Connect (green button).
You should now see the data preview as before for factSales.
Replace the code for the step Source in all queries that connect directly with the demo data file:
- factForecast
- dimCustomer
- dimProduct
- helperProductCategories
- dimsalesChannel
Optional: Editing the data source credentials
To access all data source credentials used in Power Query, click on Data source settings in the Home ribbon:

In the appearing window, you can select a data source and then edit its credential via Edit Premissions.
4. Save the PBIX file and publish it to a workspace on the Power BI Service
You can either overwrite the existing dataset or add a new one with a different name.
5. Go to the dataset settings and provide the data source credentials
In the dataset settings, navigate to Data source credentials. A single line with "Web" in front of it should be visible:

Click on Edit credentials and the in the appearing window, set the Authentication method to "OAuth2" and the Privacy level to "Organizational". Then, click on Sign in and you will be asked to provide your MS365 account credentials.

6. Test the data refresh
Navigate back to the workspace overview and then initate the data refresh for the just configured dataset:
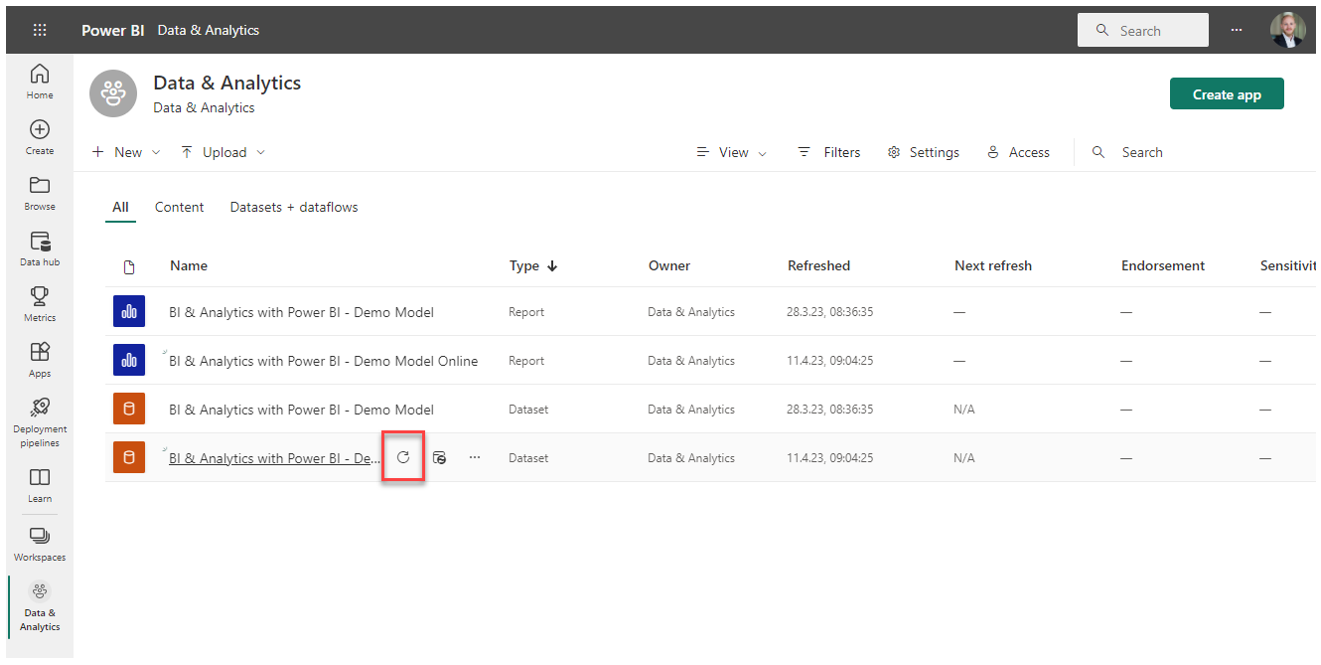
The refresh should then run a few minutes (probably even just a few seconds because it is not much data), indicated by a turning circle symbol in the column Refreshed.
7. Configure the scheduled data refresh
Navigate again to the dataset settings and scroll down to Scheduled refresh.
Turn the scheduled refresh on via the button, make sure you have selected the appropriate time zone, select the frequency of the refresh and finally add the times you want the dataset to be refreshed:
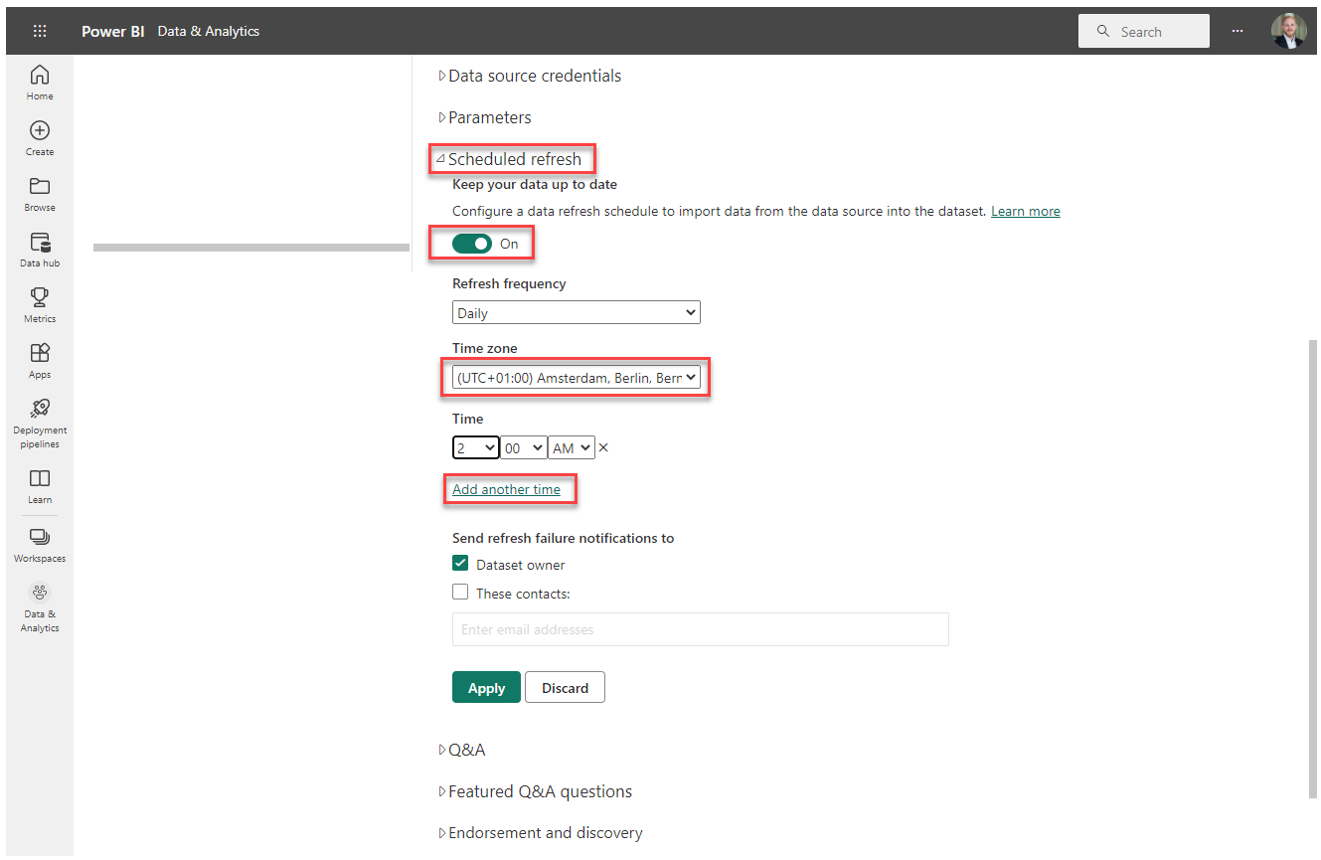
Note, you can configure the refresh to run up to eight times a day for the Power BI Pro license.
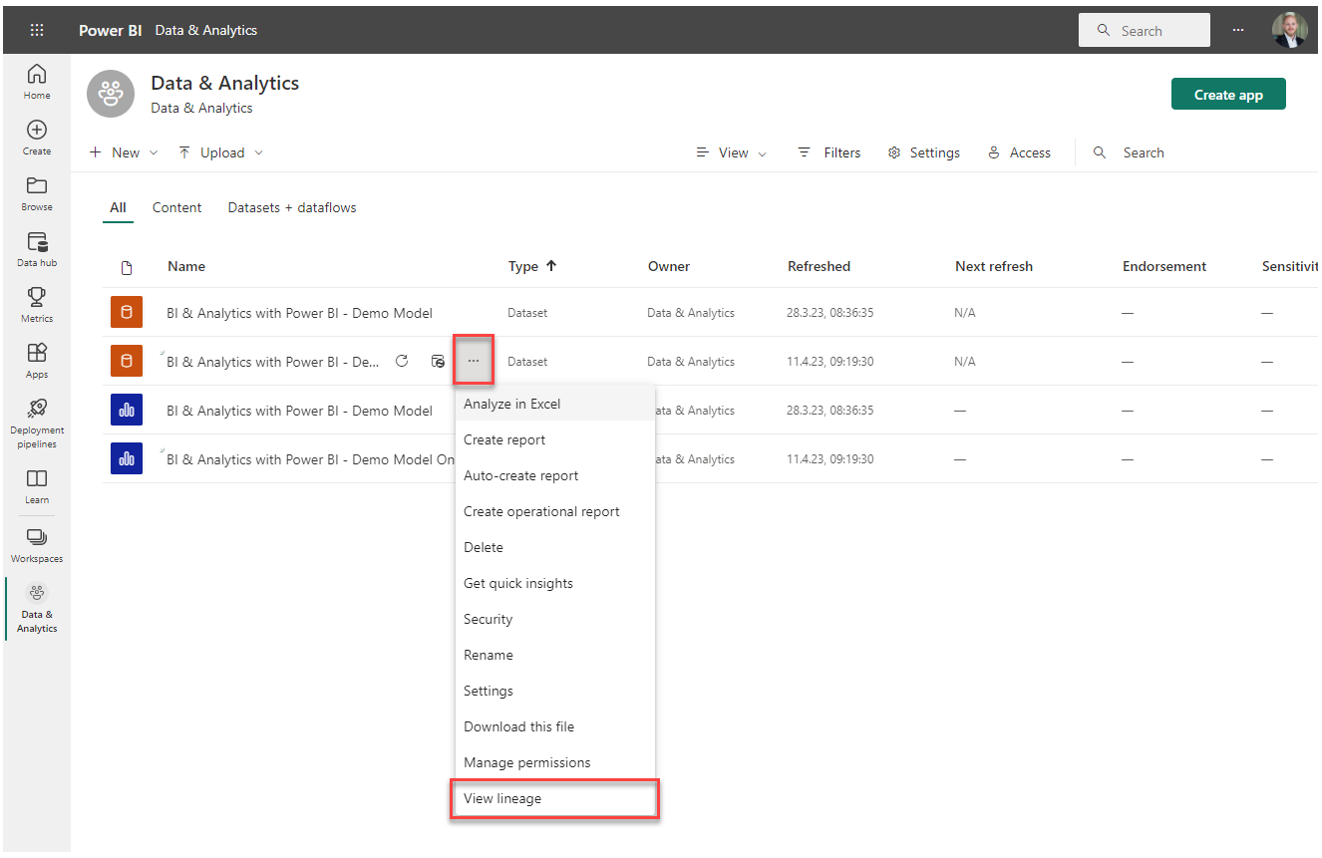
8. Have a look at the lineage for the dataset
One very useful tool in the Power BI Service is the ability to have the data lineage of a dataset being visualized as an overview.
To view the lineage of a dataset, hover over it in the workspace and click on the three dots. Then use View lineage to open the data lineage:
You should then see something like the following. It basically tells us that there is an Excel workbook used as a data source that resides on a Sharepoint. The lineage also tells us that the dataset has currently one report attached to it.

As you can imagine, in use-cases with many different data sources and maybe even multiple reports per dataset, the lineage view can be very useful to quickly visualize and understand dependencies.