3.3 | Preparing the customer dimension (dimCustomer)
After connecting the Excel file and its data tables, we will now proceed with preparing the individual dimension and fact tables using data transformation steps in Power Query. The first dimension we will prepare is the customer dimension containing respective master data.
1. Inspect the (raw) data table
First, let's have a look at the customer data table dimCustomer in order to understand the transformations we have to apply to the data.
When connecting with the Excel file, Power BI has automatically applied some basic steps to the table as we can see on the right side under APPLIED STEPS:
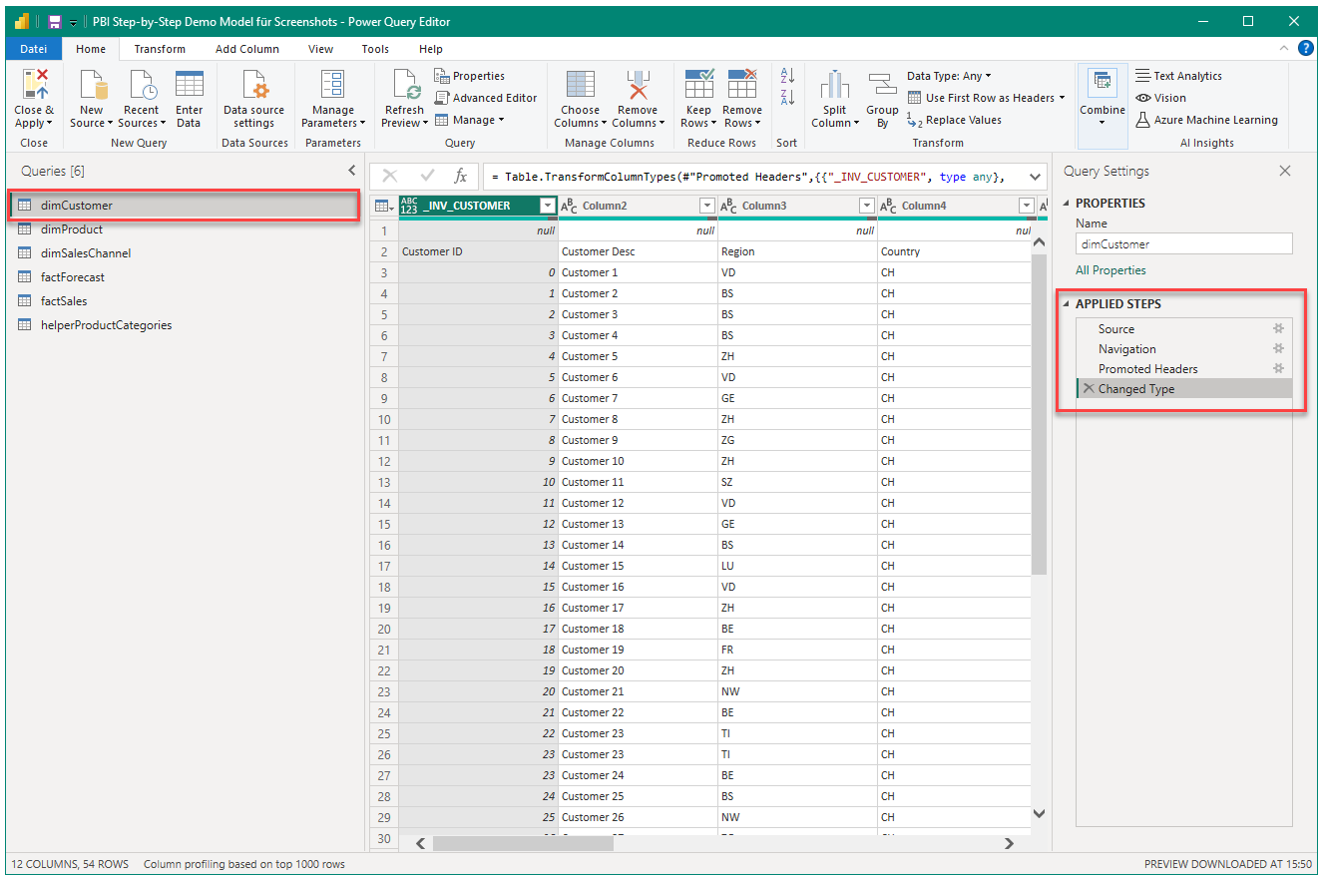
The steps Source and Navigation are needed in order for Power BI know where the Excel file is saved and which Excel worksheet we want to use.
The steps Promoted Headers and Changed Type are also generated automatically and it is an attempt of Power BI to identify table headers and set the columns to each appropriate data type. However, we can already see that there is a problem with the column headers as they are actually on row 3 in the Excel worksheet. Therefore, let's delete the last two steps and start from there.
2. Delete the automatically generated steps Promoted Headers and Changed Type
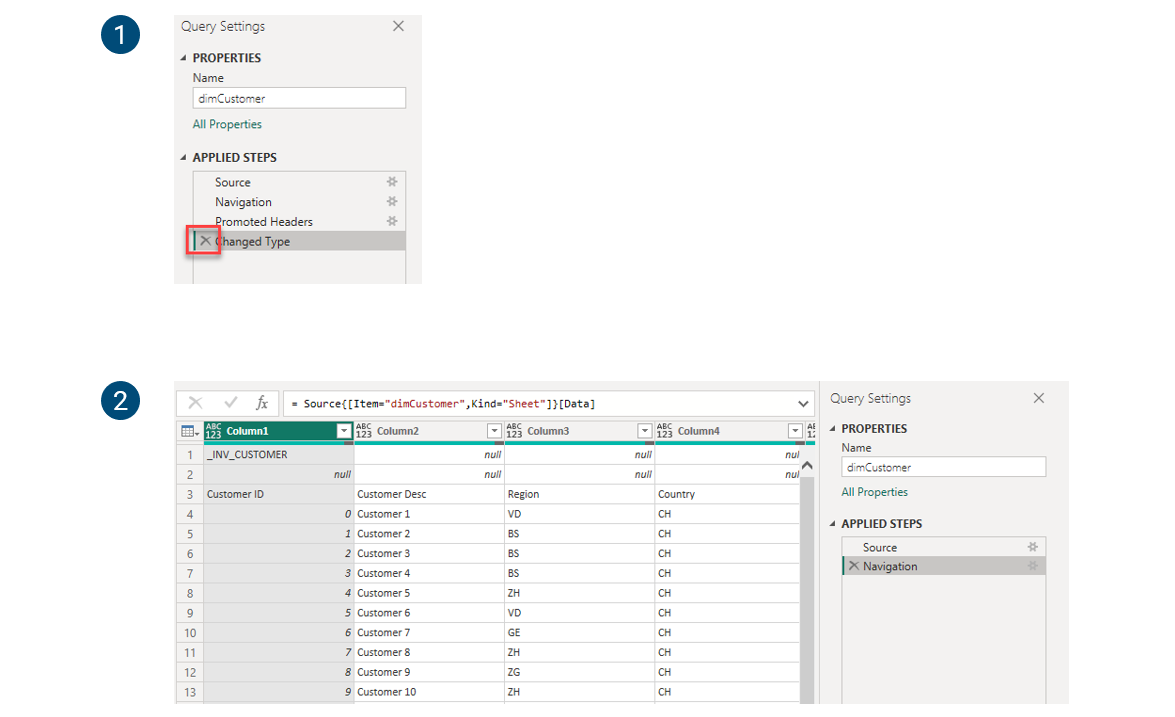
3. Remove the first two rows before promoting the header row
As we have noted, in the data table, actual column headers are in row number 3. Therefore, we first remove the first two rows and then we promote the resulting top row to become our table headers.
Home → Remove Rows → Remove Top Rows
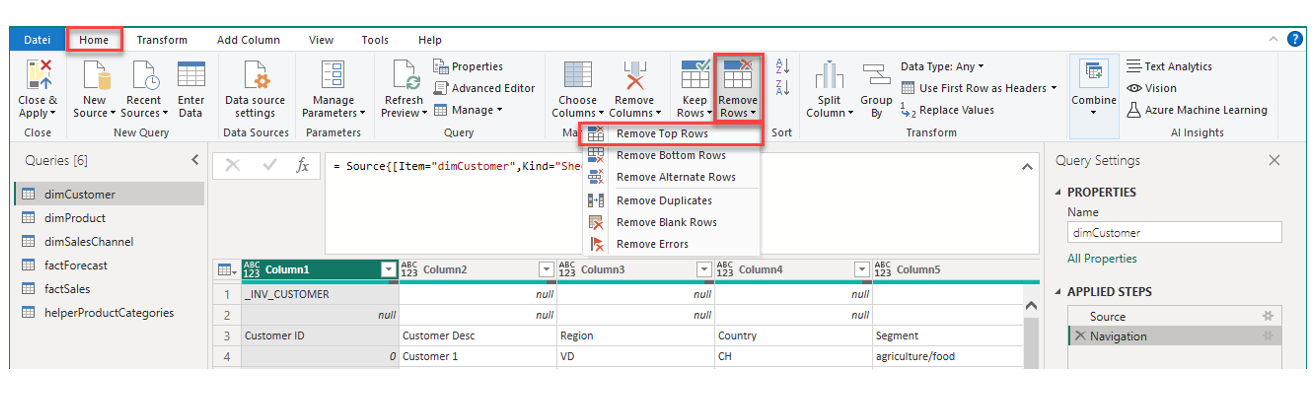
In the appearing window, enter 2 and confirm with OK:

You can now see on the right that an additional step has been generated called Removed Top Rows.
Now, promote the top row to become the table headers:
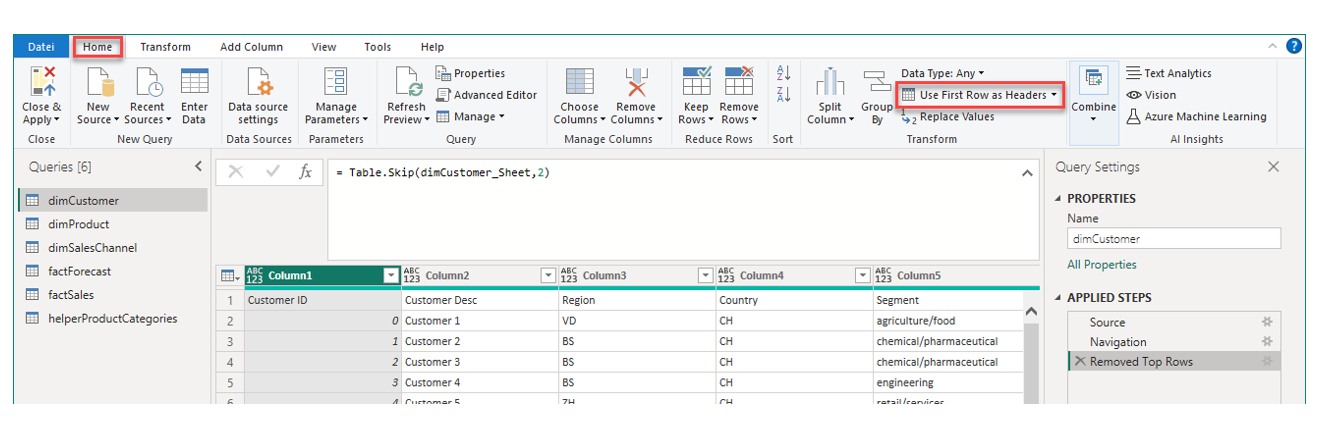
You should now see the correct column headers and an additional step has been recorded.
Please delete the automatically created step Changed Type.
By clicking on the individual steps in APPLIED STEPS, you can see intermediate results in the data transformation process. Further, note that newly added steps are always put directly after the currently selected step. Steps can be dragged-and-dropped to change the order, however this may lead to errors when steps depend on each other.
4. Select the columns needed
An important step in each ETL process is the selection of the columns that are needed.
Home → Choose Columns
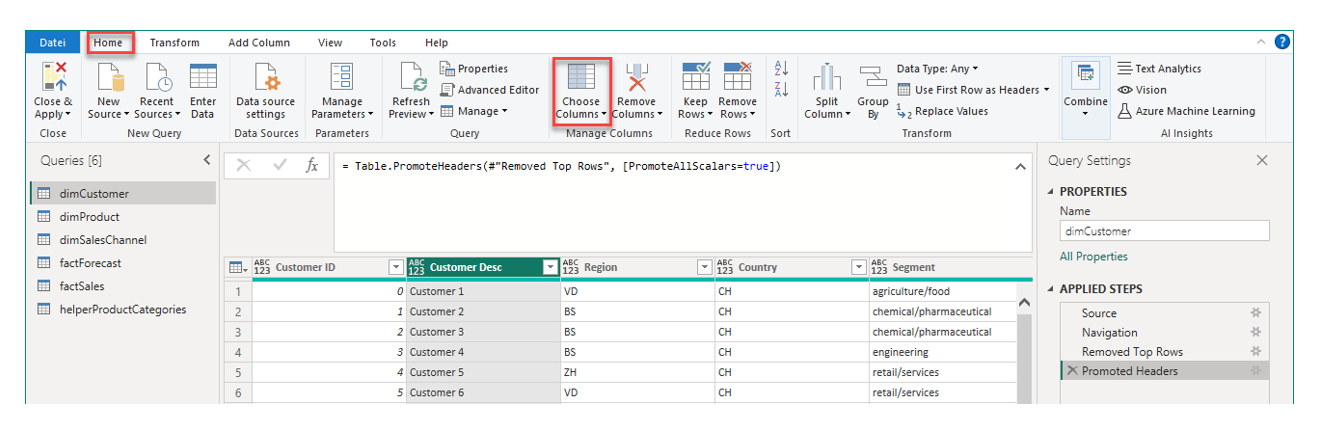
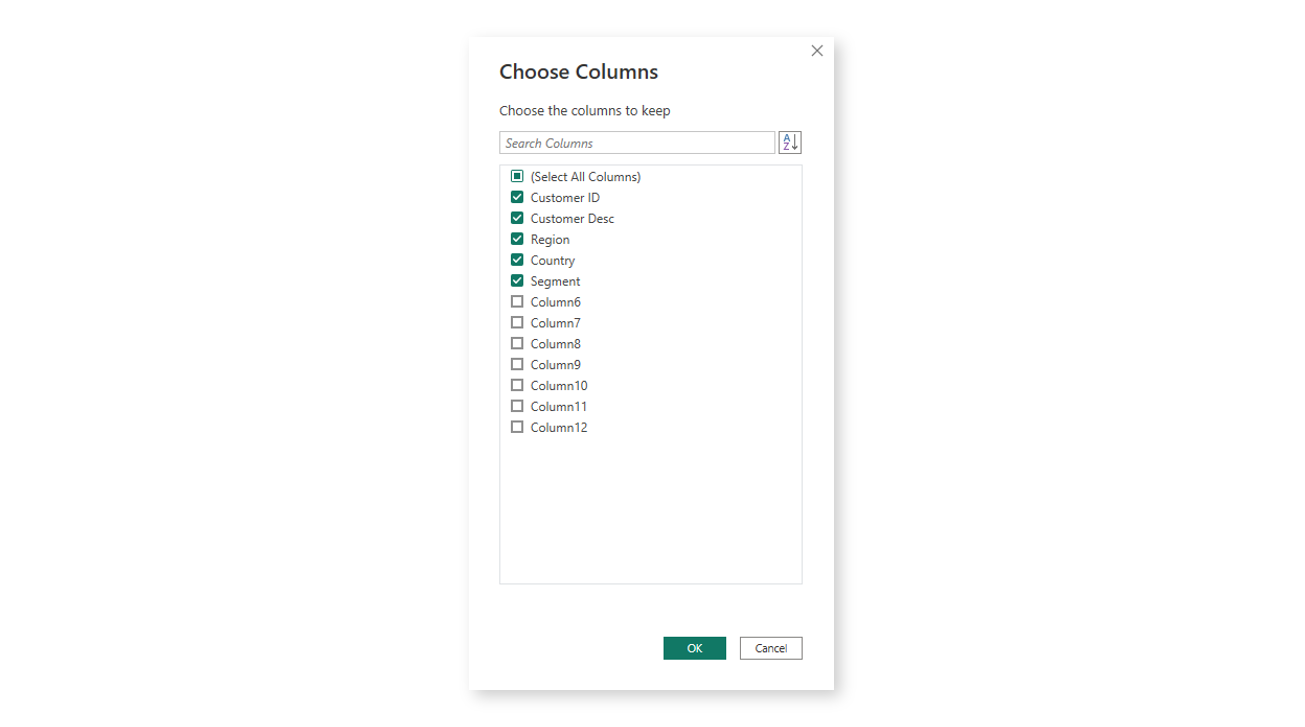
Select the columns Customer ID, Customer Desc, Region, Country and Segment. Note, often when we work with Excel as a data source there are additional columns loaded which are empty and not needed (here Column6, Column7 etc.)
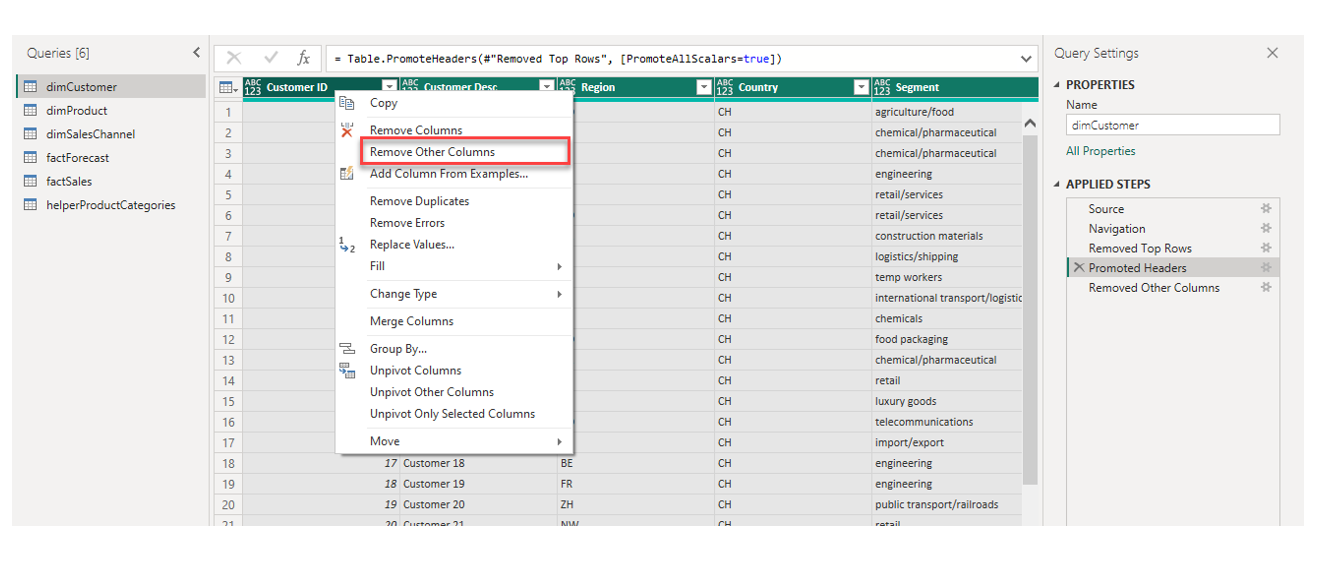
Alternatively, hold the CTRL key on your keyboard and select with your mouse all the columns. Then do a right-click into one of the column headers and select Remove Other Columns:
There are many features and options available via right-click on a column header.
5. Set the data type for each column
As I have outlined in chapter VERWEIS it is important to define the data type for each column. To do that, we click on the symbol in each table header and select the data type.

As noted in chapter VERWEIS we want to convert all table columns to either text, date or numbers. Because we neither have dates nor do we have numerical data with which we want to perform calculations, we define all columns of dimCustomer to be of the type text (i.e. string in more technical terms).
Alternatively, select all columns of the same type, do a right-click and change the data type for all selected columns at once.

As you can note, there was only one transformation step recorded Changed Type although we changed the data type of multiple columns.
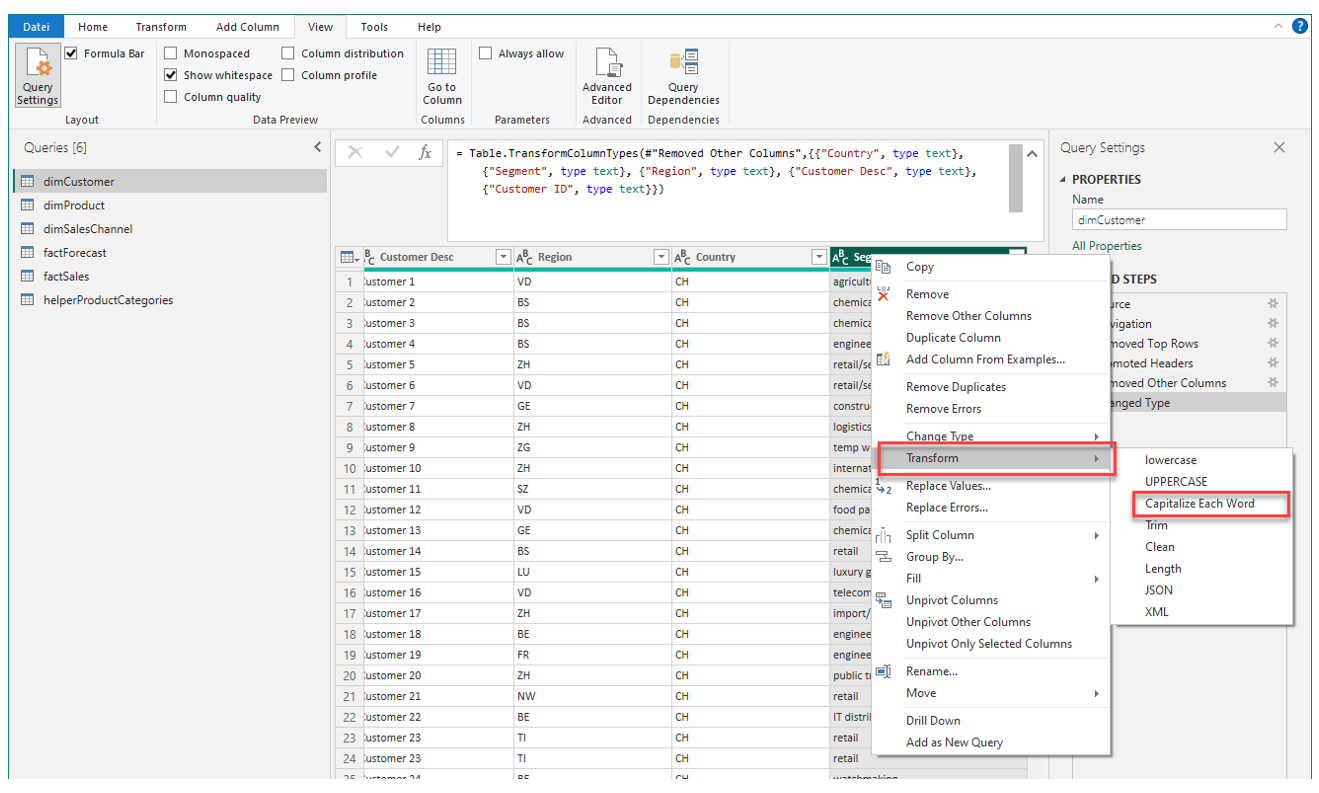
6. Capitalize all words in column Segment
Looking at the column Segment, we can see that all words start with lowercase letters. We can improve that with just a right-click on the column header and then follow Transform → Capitalize Each Word.
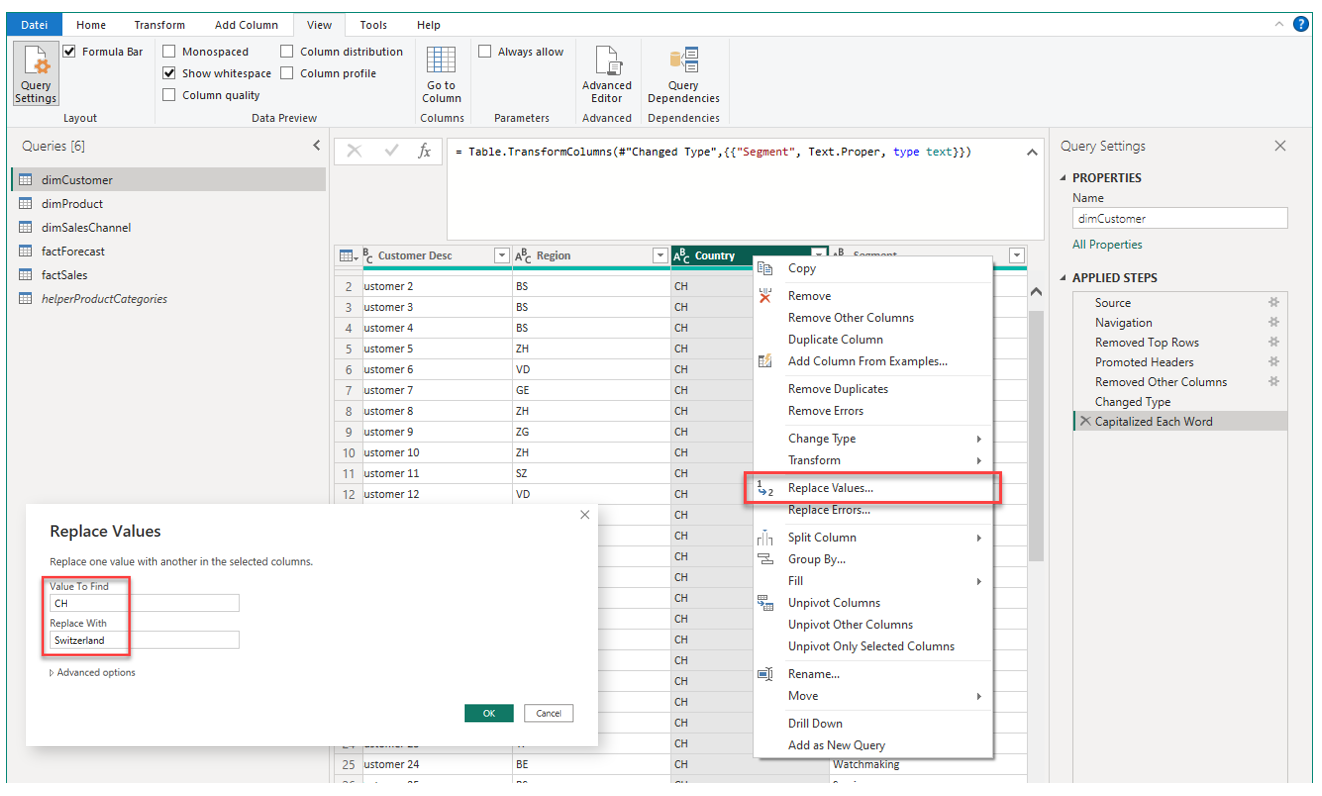
7. Replace values in column Country
Let's assume we are not happy with just the ISO code "CH" in column Country and we want to replace it with "Switzerland" instead. Again, just a few clicks are needed to record this transformation step:
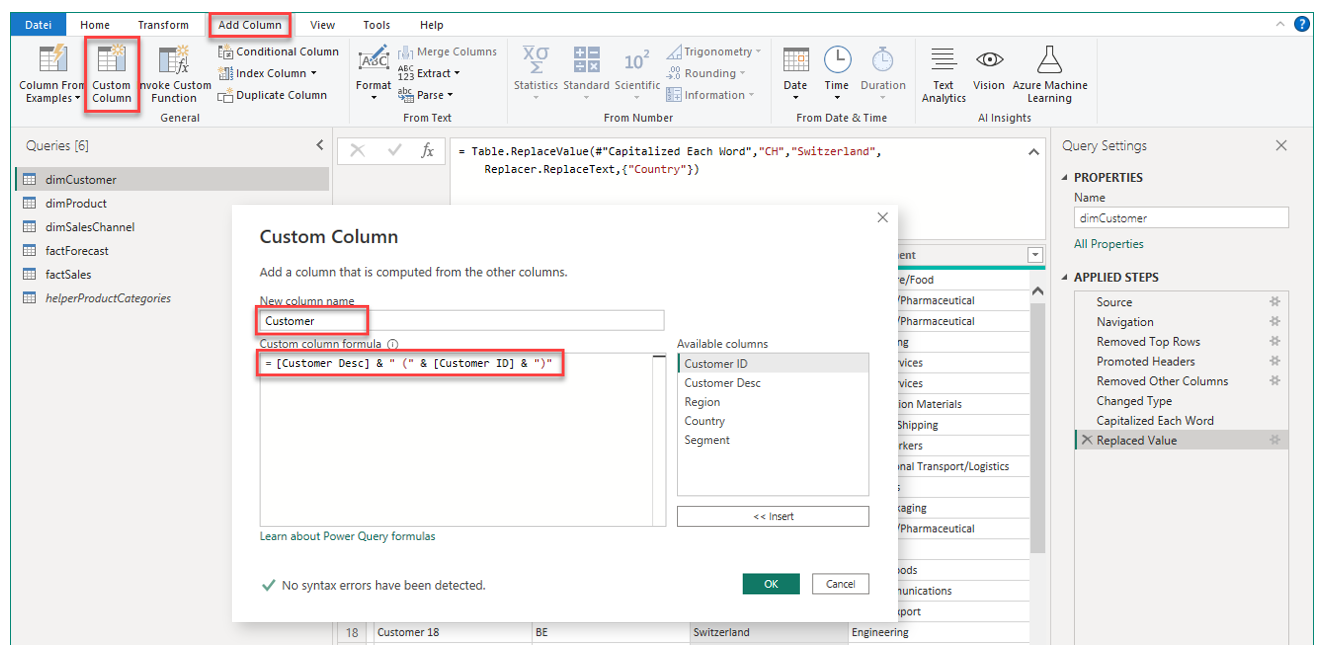
8. Combine Customer ID and Customer Desc in a new custom calculated column
It is often useful to combine the ID and label of an entity in a dimension table in new field. This is helpful as it allows a user to search for both the label and ID in a filter selector.
To do that, we create a new custom calculated column with an easy syntax:
Add Column → Custom Column
In the appearing window, name the new column Customer and enter the following code:
[Customer Desc] & " (" & [Customer ID] & ")"
The code used is fairly straight forward: we simply combine (or chain) two columns of type text using the &-symbol and some brackets to put the ID in after the Customer label.
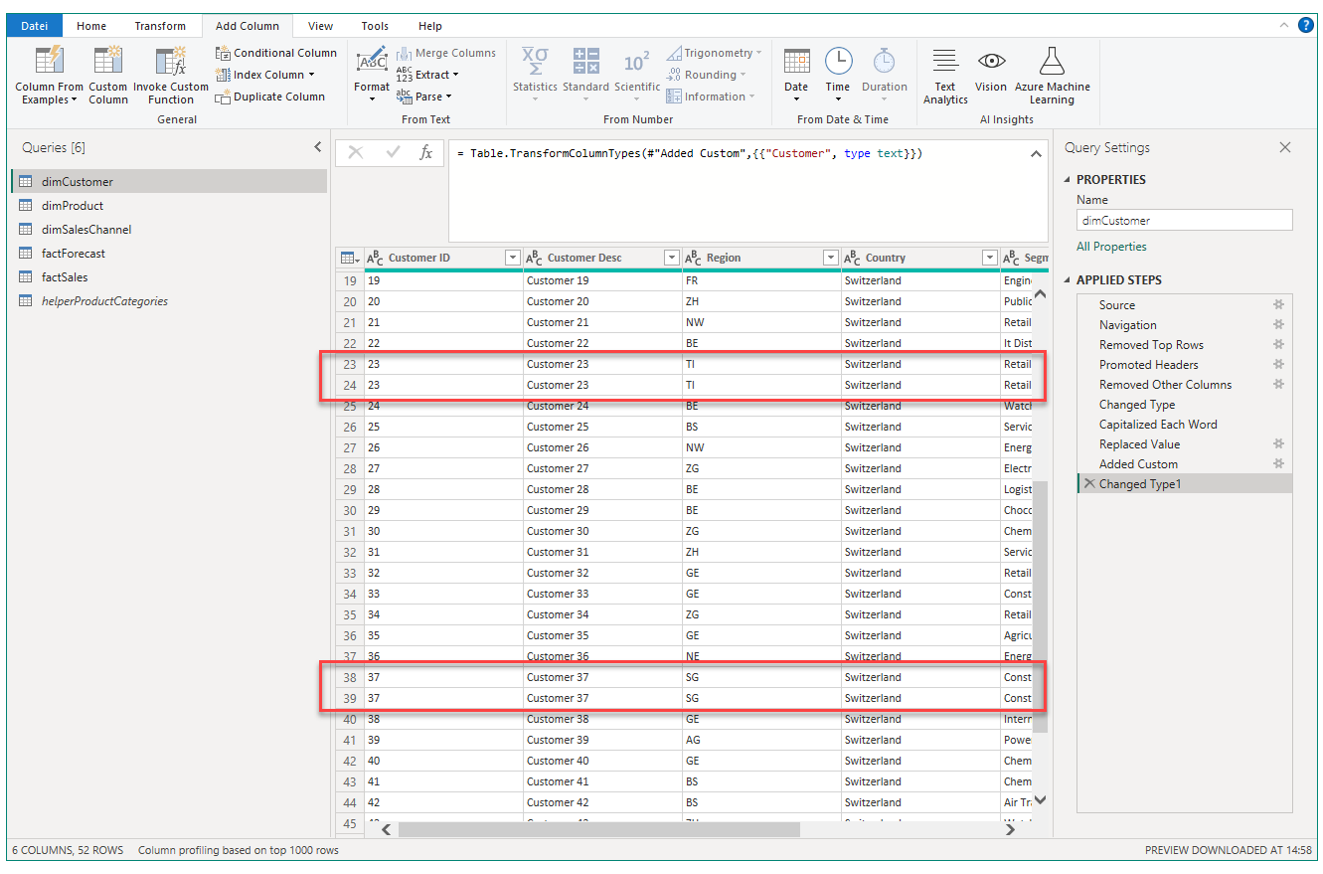
After hitting OK, you can see the newly added column in the preview table. We also need to set the data type of the new column which will be text again. When doing so, you can see that a new step named Changed Type1 has been created. Power Query automatically added a "1" in the step's label because each transformation step has to have a unique label.
You can change the label of a transformation step in APPLIED STEPS with simply double-clicking on the step and renaming it. It is helpful to rename steps with meaningful labels so other people also working on the model have it easier to have an overview of the transformation steps applied.
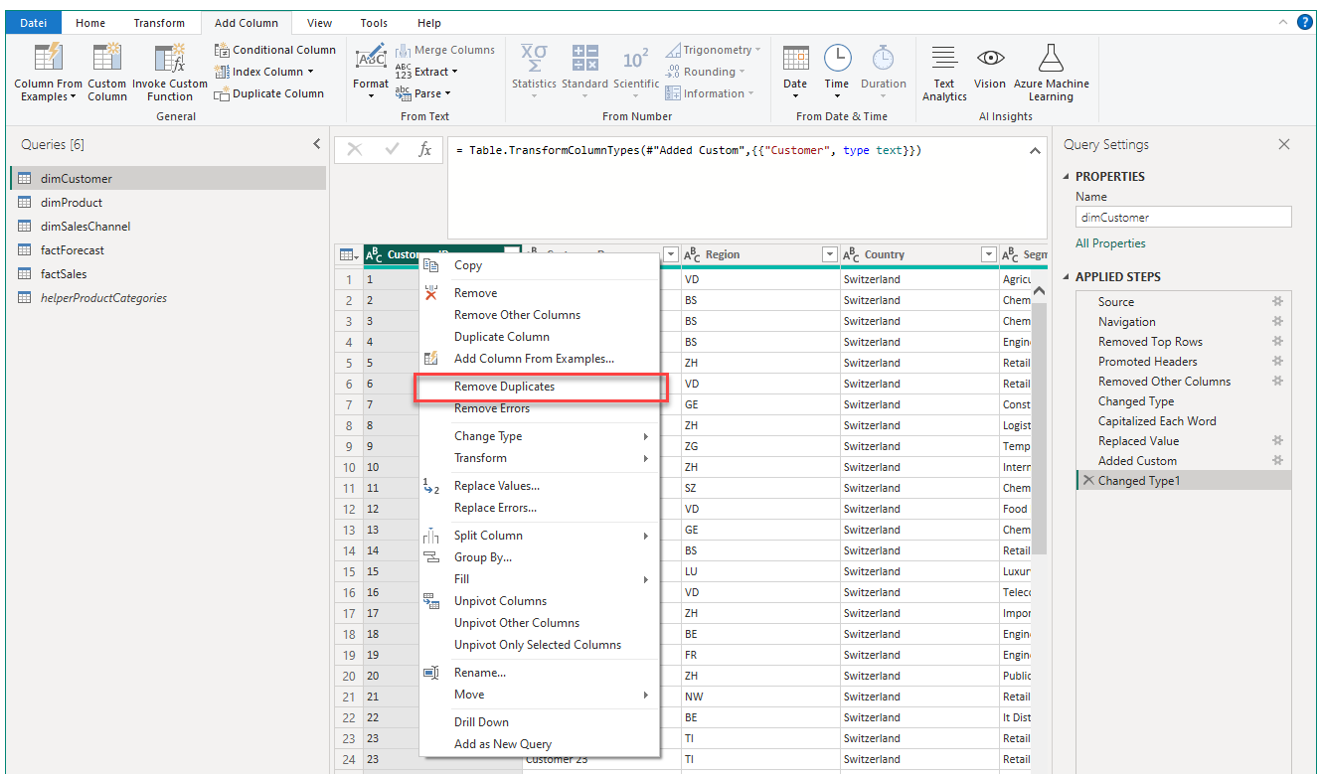
9. Final step: Remove duplicates in column Customer ID
Upon careful inspection of the data, we can actually see that there are duplicate entries for the customers with ID 23 and 37:
This is a typical data quality issue often occuring in practice, in particular when working with data sources like text or spreadsheet files.
Given that the column Customer ID shall be the primary key column of dimCustomer, we need to make sure that all values in Customer ID are unique and there are no duplicates. Simply do a right-click on Customer ID and click on Remove Duplicates.
Please note, in a real-world application you would of course want to make sure that these issues are fixed at the data source level and not in Power Query.
In order to quickly check a column for duplicate entries, select the column and do the following: Home → Keep Rows → Keep Duplicates. The table preview will only return duplicate rows.
Now our table dimCustomer is ready to be used in the data model.